|
Composition: Rule of thirds See the picture to the right? See how this picture is sliced up like a tic tac toe board? Basically, here you don't want your center of attenton to be in the center square. You want to "lead" the viewers eyes to what is the central 'focus' of the image. Now when taking a close up of a diver, or critter it maybe better to place it in the center. Is it states, it is a "Rule" not a "law". That picture is also a decent example of "Leading lines" See the hose going to the mask? Is that leading your eyes up to the mask itself? That was the idea when I took this underwater shot. If you look closely at the picture, you can tell where I placed the flash unit, up and to the left. Doing that created the contrast I wanted and it was far enough to the left to eliminate the "Back scatter" that is a common problem with underwater pictures. In other words, I did what I needed "In the camera" rather than using software to fix it later, which I prefer. That picture is not retouched in anyway, other than to reduce it's size (& I added the lines) and it was shot on 100 speed film, Velvia. Remember to set your flashes as far to the left & right as possible to reduce or eliminate "Back Scatter", good viz helps too. The rule for taking u/w pictures is to focus/shoot 10% of the viz, so if viz is 80 feet, your maximum shooting/focusing range would be 8 feet, which is well in range of nearly all off camera flash units. |

This picture was taken with one flash unit in about 90 feet of water (Truk Lagoon). Plus I think it "tells a story" of an event that happened, be it tragic or peaceful. I like pictures that speak for themselves. (Click om image to see this in the SCD Underwater Gallery) |
|---|
|
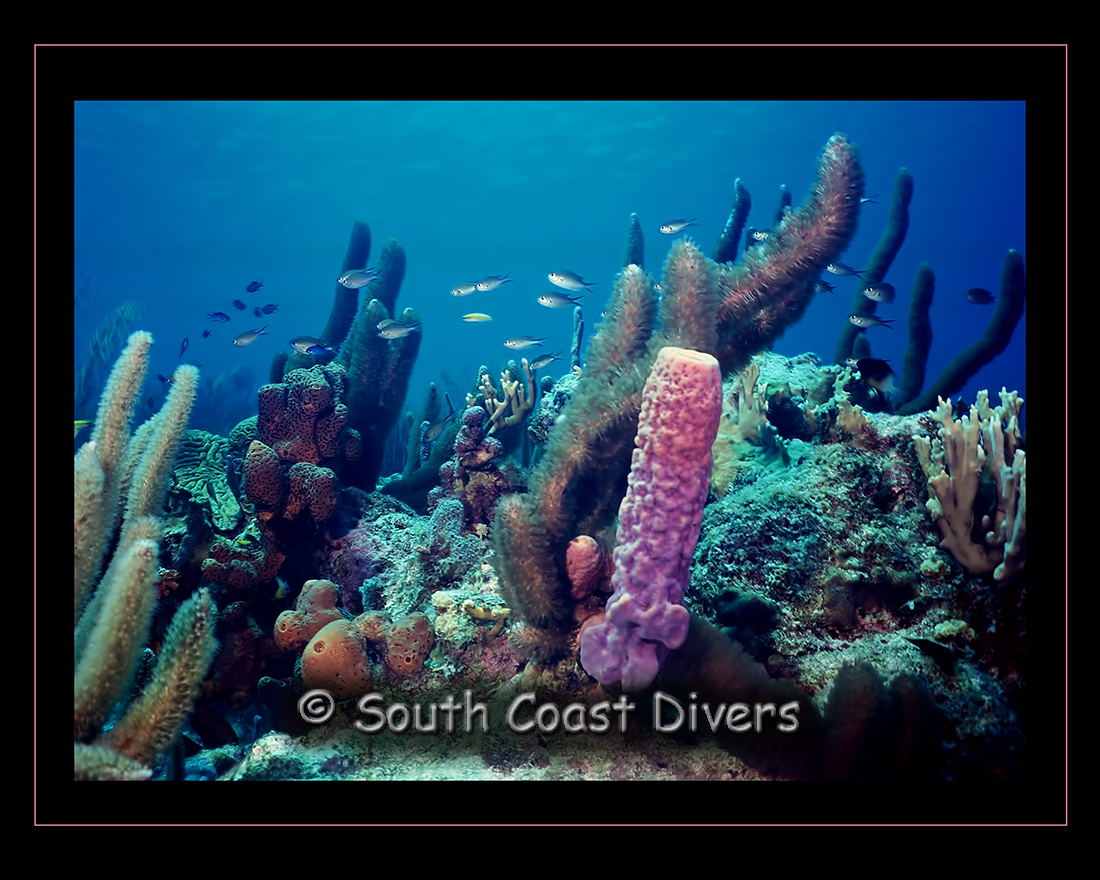
When underwater SHOOT UP!! Or at your subjects eye level. When "Above water" I cannot count how many people will take pictures of kids, pets/animals or other people and "shoot down" on them and hate their results. I always say "Shoot at your subjects eye level, it only takes a second to do and you will love your results". Underwater, this idea changes slghtly to "shooting at eye level or shoot up". I look at this one tip as the one that can and will help your pictures look better than anything you can do to help your u/w photos become "Images". One thing you can consider, put a sticker on your camera that says "Shoot up" to help remind you what you can do with this technique. As always, this is a rule, not a law, there are times when this will change the picture completely, other times, it just doesn't work. But when shooting a reef scene if you can show the background as pointing up towards the surface, it just makes a much better shot. If you can show more of the reef and the surface, even though it will loose much of it's color, it makes a much more pleasing picture to the eye. Also, remember to "Get close" when you think you are close enough, get closer. See the picture to the right? I took this with my Sea & Sea 35mm film camera with 2 strobes, a YS90 and a YS15, so I could have at least a 3 stop difference between my lights. This helps to build contrast making the picture feel more "Alive" in my opinion. This was taken on Velvia 100 film. The distance from me to the reef was about 2-3 feet shooting with a 16mm lense on the front of my camera. Other than reducing the size and the watermark, this shot has not been manipulated, the work is done "In the camera" as opposed to Photoshop. |
I took this shot in Bonaire on a beach dive. For me, it shows the "feel" of diving in the Caribbean, clear & warm water. This is fairly typical of diving in Bonaire. (Click om image to see this in the SCD Underwater Gallery) |
|---|
|
Exposure, exposure, exposure... I cannot emphasize how important this is. With underwater photography, most likely, you are using at least one external flash unit. Remember that max distance you will get on it is about 10 feet. If you have one "On the camera" only, expect it to go about 3-5 feet, or less depending on the conditions u/w. Remember that flash exposure is calculated as from "Flash to subject distance, NOT subject to camera distance" it makes a difference. The hard part of this is "Fish". Fish can have all kinds of reflective properties. Some fish reflect like mad, over exposing your picture, "Grrr..." is a common reaction when this happens and that fish is now gone. Plus, the opposite also happens. That picture you took of the Giant Black Sea Bass looks black, when u/w it looked silver with black spots. This is where the digital advantage is, you can see your results right there, u/w. But how do you get that silver coloration that you saw? If there is enough light u/w, consider shooting with available light, no flash. Reducing your flashes strength also helps. You can also move your flash unit(s) way out to the left and/or right. GBSB can be very difficult to get your shot right. If your camera has override options, use "Aperature priority" whenever you can over "Program mode", your pictures will come out much better. I shoot in manual mode u/w, yes, I will mess up a few pictures, but I can control my contrast much better than shooting in program mode.
White balance. |
 This image is one of my buddies (Marc) and this shot was taken by another buddy, Wayne. Look at how he set up his flash units and how these have brackets with a set up for extra dive lights, or as we say "modeling lights".  
|
|---|
|
Other tips & pointers. Be "selective". I don't know how many people I have met who have taken 2,000 to 4,000 pictures on a dive trip and never know what to do with them. If you are selective, you will take better pictures period and hopefully, a bunch you can hang on your walls and have the stories to go with them. I feel you have enough here to get you started, but if you want more, look into "Framing your shot" and things like advanced focusing techniques. Remember that in underwater photography, you have to "Get close" or the closer the better to your subject. I hope what I have given you here will point you in the right direction to taking better pictures.
Further reading: |
|---|
You are viewer number


since 03-21-10.